
5 of 52: Honda K-Series Budget Turbo Kit
QUICK SPECS
Estimated Time Of Completion: 1 Year
Material Used: eSun PA-CF
Products Used: Fusion 360, Einstar Shining 3D Scanner
Number of Revisions: 15
Difficulty: Hard
Ease to Mass Produce: 3/10 (Lots of manufacturing outsourced)
3D Scanned and Modeled Turbo Kit
This is probably my most extensive and elaborate project yet.
I was tasked with designing a turbo kit good for boosting a honda engine’s power output from ~200HP to over 600HP. Make it easily accesible to people, and as headache free as possible. The challenges were considerable and the time invested into this project was substantial.
Design Considerations:
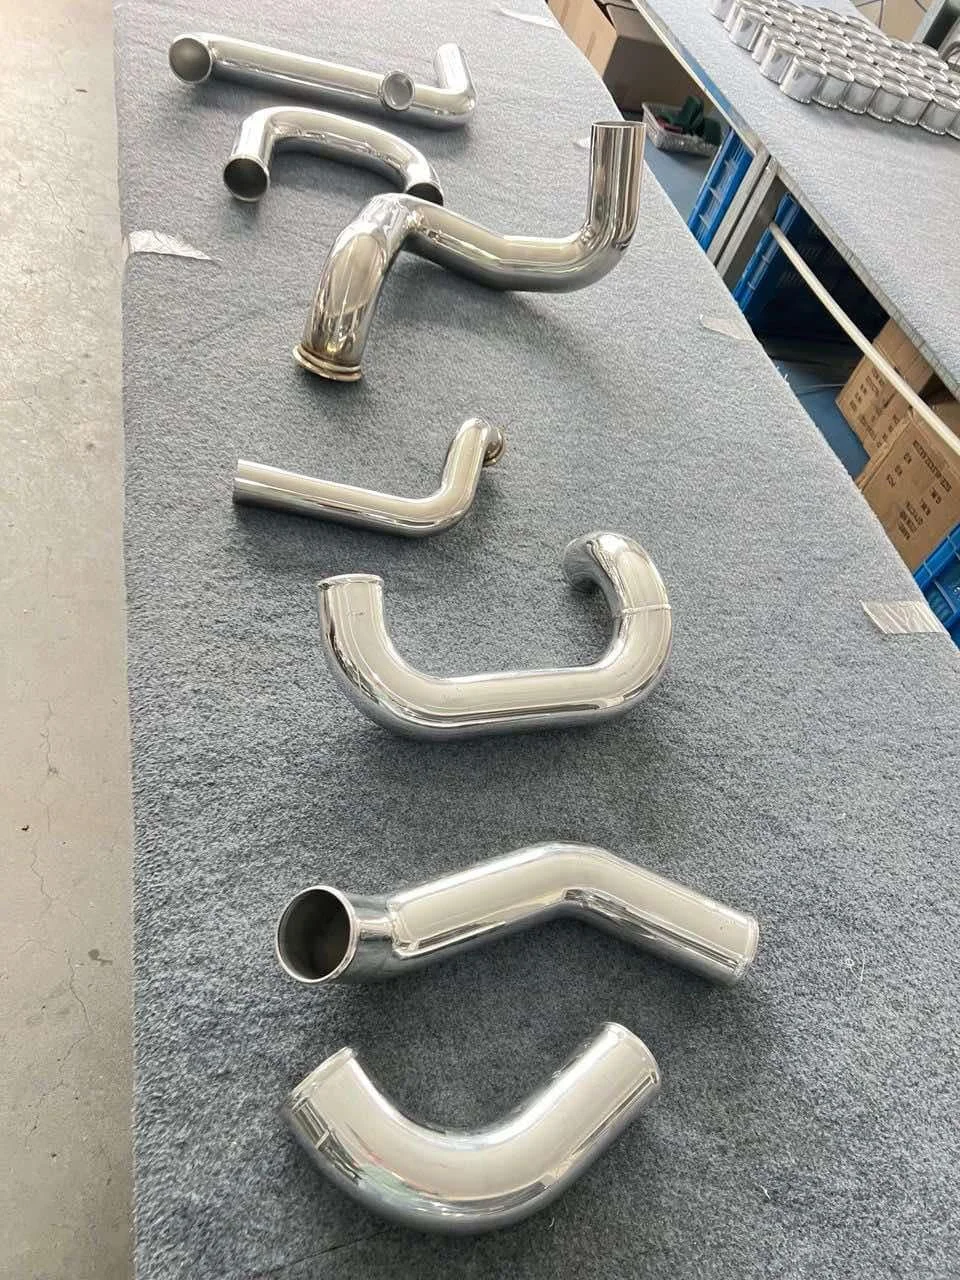
CNC Mandrel Pipes Rev 1
Fit multiple models of Hondas, 92-95 Civics and 96-00 Honda Civics with K series engine swaps
Plug and play fitment, no modifications necessary
Affordable cost
Durability in mind
Give the end-user agency to customize until they see fit
Modular design allowing for upgrades long term
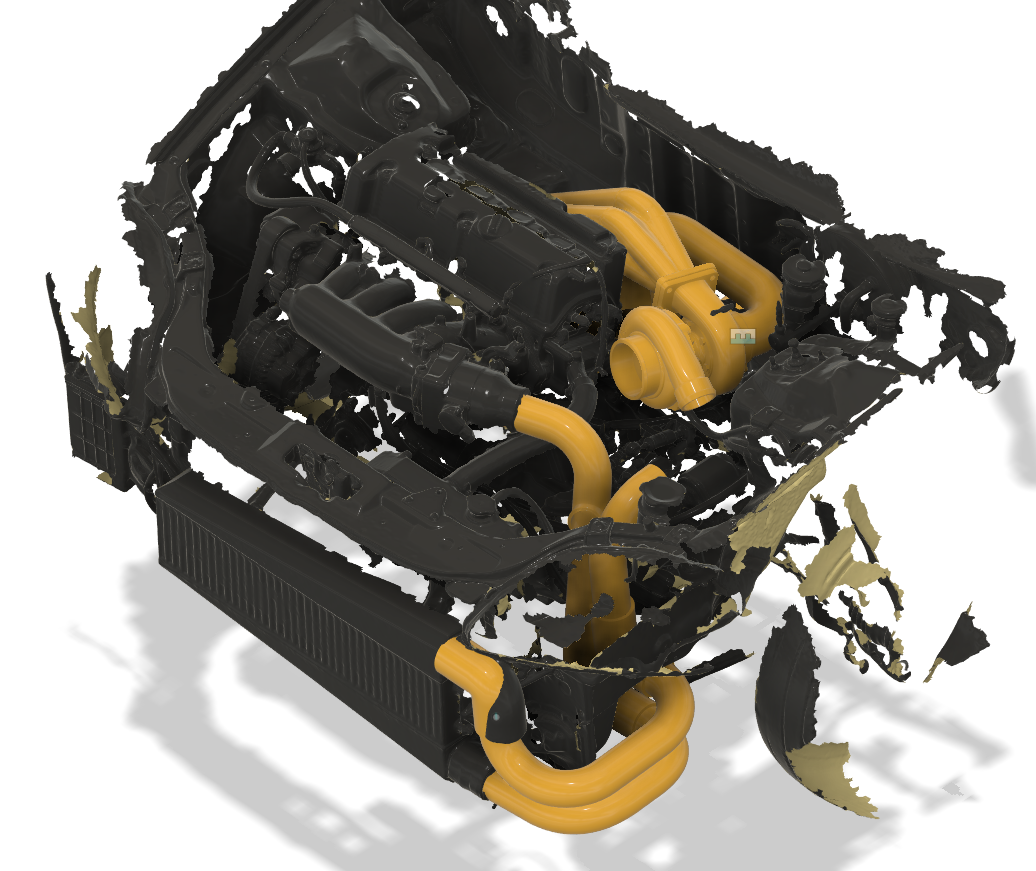
I started the project by 3d scanning an Engine Bay of a 1996 Honda Civic. From there, designed the pipes and routed them in a way that fit inside the engine bay. There are small distinct difference between the 96-00 and the 92-95 Civic engine bays that have some small considerations to make, but overall was pretty straightforward.
The biggest challenge of this project was the manufacturing hurdles. This is the 4th version of a turbo kit we’ve offered in house for 5 years, previously all completey hand built in house using measurements alone. The big issues we ran into were related to turnaround time both interally and externally, so I set forth to find the best solution to cater to us and our customers.
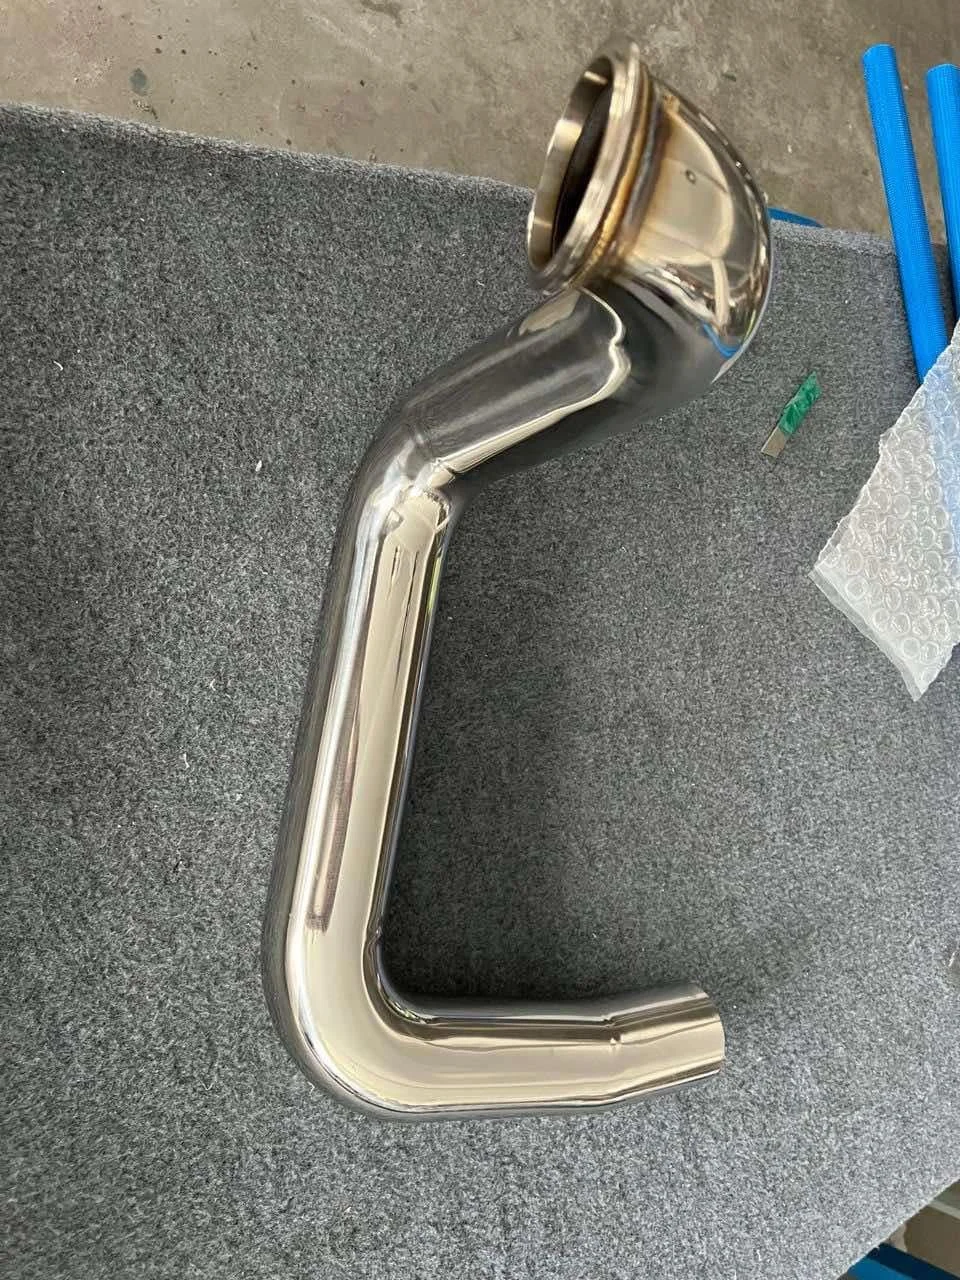
CNC Mandrel Bent Downpipe in SS304 Revision 2
I knew from the outset, I wanted to have all the pipes be CNC mandrel bent for maximum repeatability and elimination of human errors where it comes to TIG Welding the pipes. So we prioritized minimal welding possible to increase durability and reduce the chances of welds fatiguing and cracking. I also wanted CNC bent pipes so we knew that every pipe would fit perfect with zero worries of accidentally missing an angle by a few degrees.
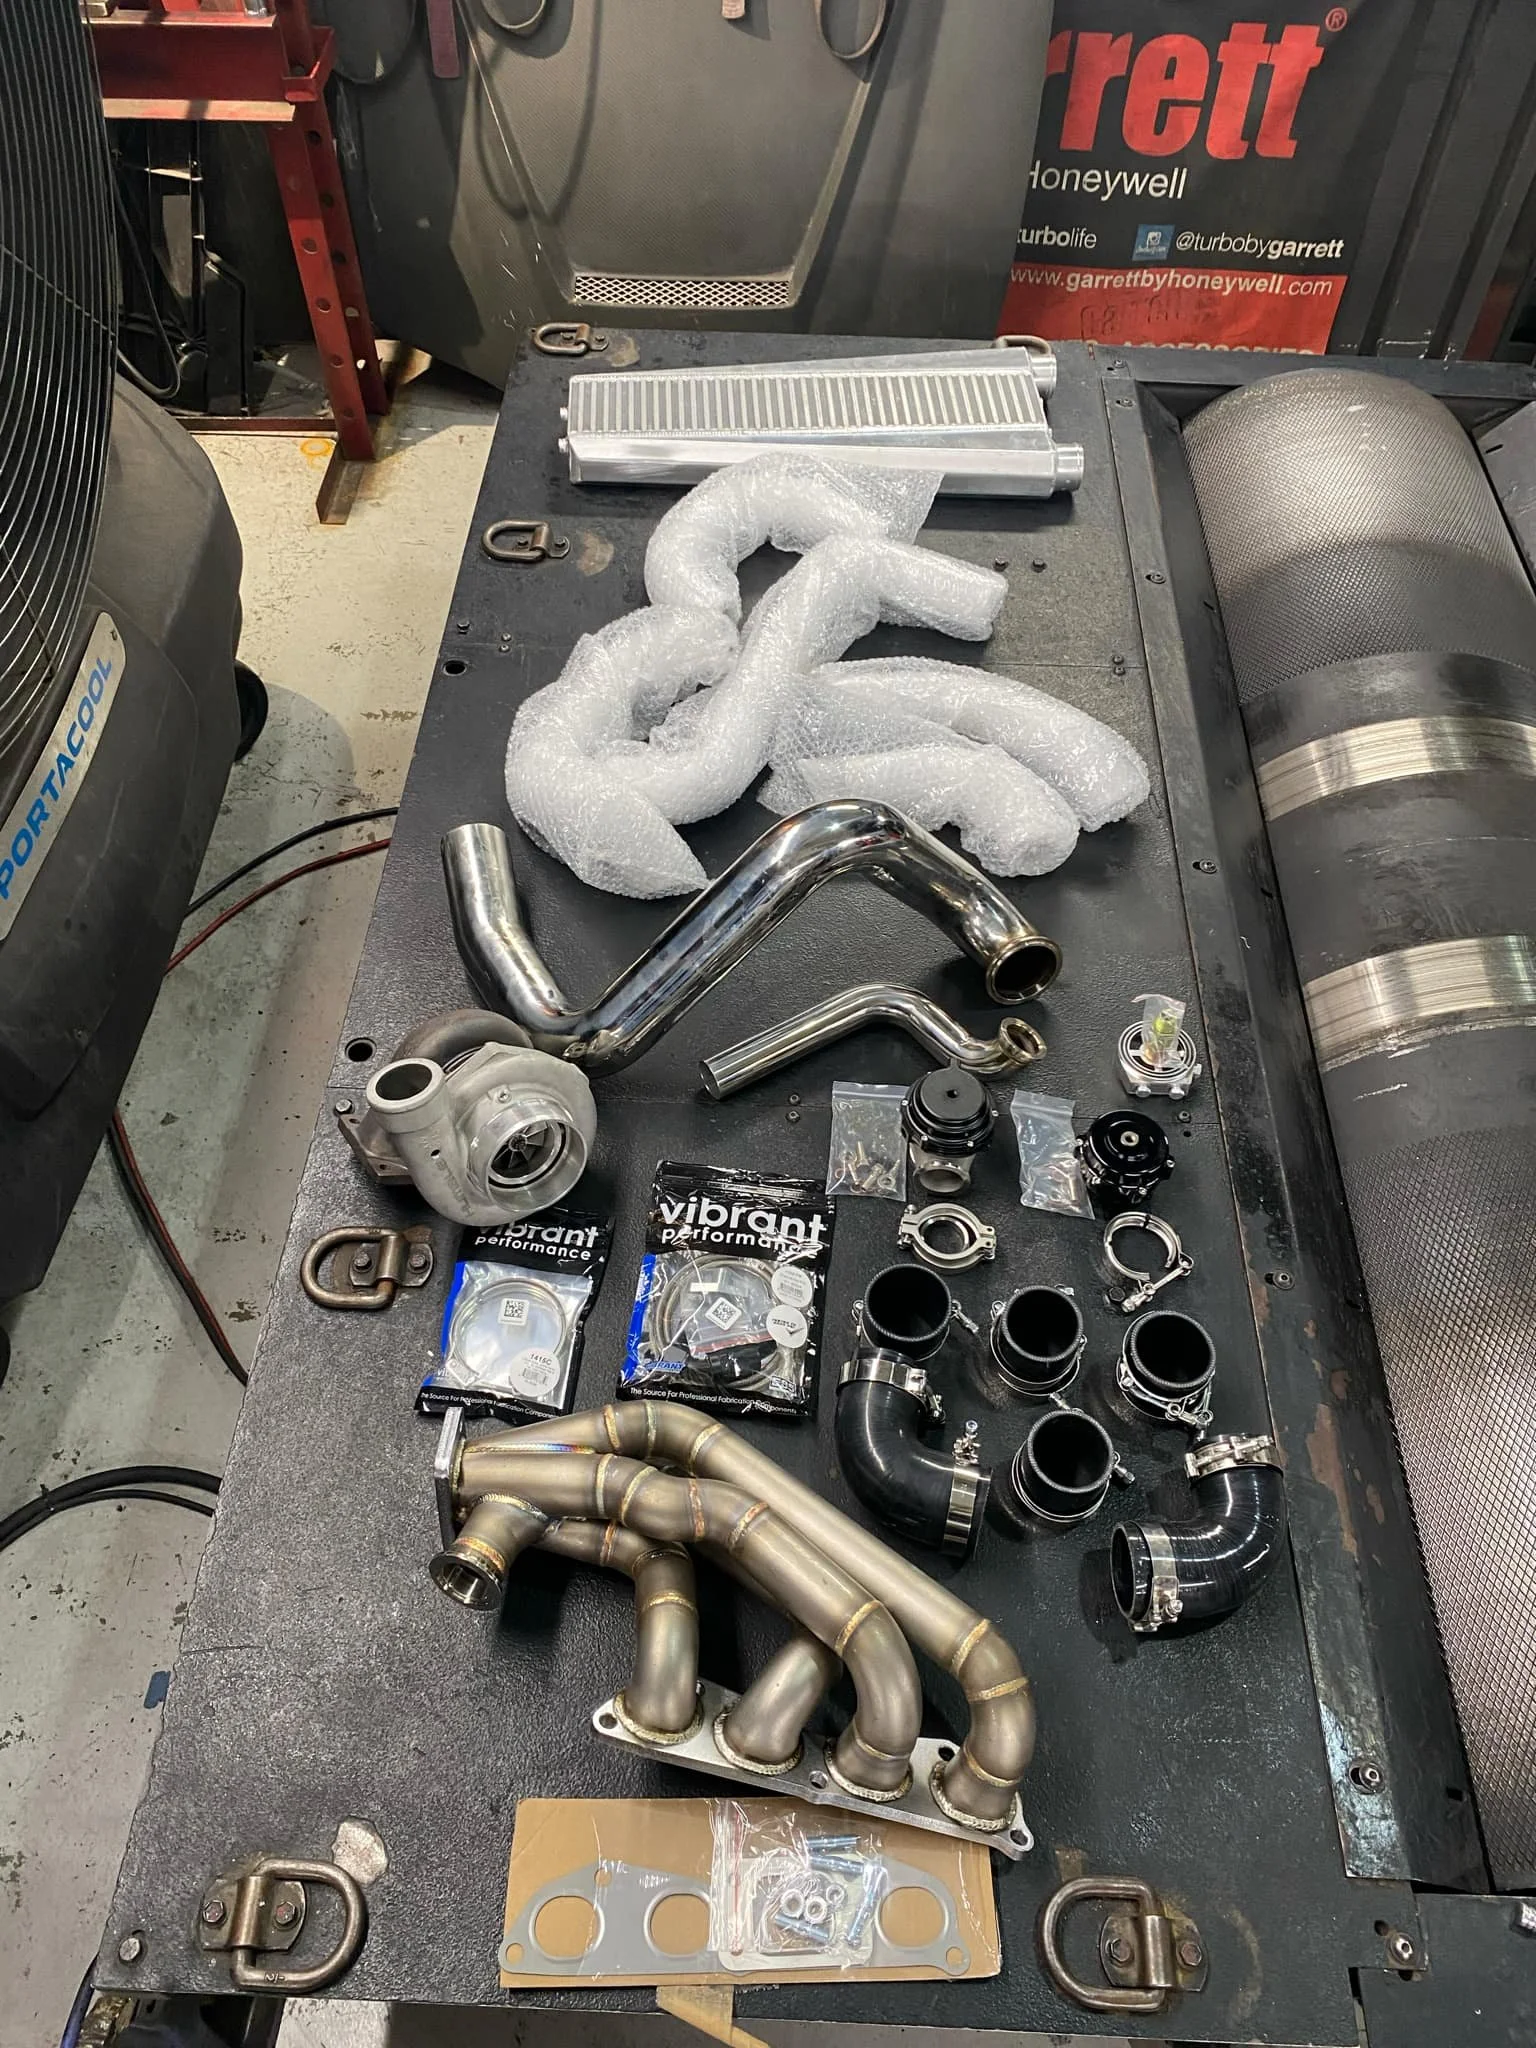
The entire kit laid out
Eventually I found a manufacturer to do these pipes for us and we got them made. The process to go from design to first prototype pipes before starting production was ~4 months. When we received the pipes, had to make a small adjustment to the downpipe. Another 3 months. We received our second prototype, and it was still slightly off. It turned out my 3D scan was slightly not horizontal with the ground and offset about 10 degrees or so. We implemented that 10* in the design and began production, another 4 months. I really learned the importance of validating.
For the remaining parts of the kit, I leveraged our past experiences and knowledge knowing which components to select. A year later, we received our production run of over 50 kits ready to ship.
Having just received our full shipment of production run parts, the fitment and install was a breeze and extremely easy. 3D Scanning/CNC together is a potent combo for designing exhaust and intercooler pipiing setups.
This combination of parts is well and easily capable of over over 700HP. It’s now in the customer’s hands to make it happen.
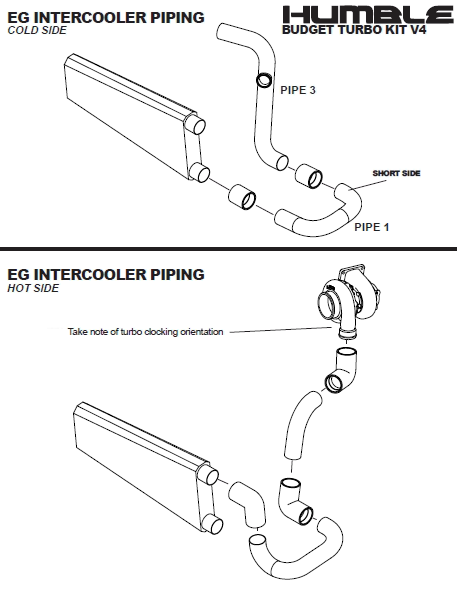
EG Intercooler Piping diagram for the alternative configuration of the kit
I took the lessons learned from designing the instructions for the FC IGN1A Coils and applies them here making easy to read diagrams for the end user to understand all the piping orientation. One of our most common pieces of feedback was having to explain to people which direction each pipe and coupler went. This guide should make it easier to understand.
I really am getting adicted to making the manual part of the project. I honestly find it just as satisfying as the design portion of these projects. I think compared to most products on the market like this, having a full assembly diagram really helps elevate a ‘budget’ project to feel quite a bit more premium and obviously crafted with care.
Upon receiving the kits, I went ahead and did an install to make a final 100% check that everthing fits as intended. I was extremely pleased with ease of install and fitment of all the parts.
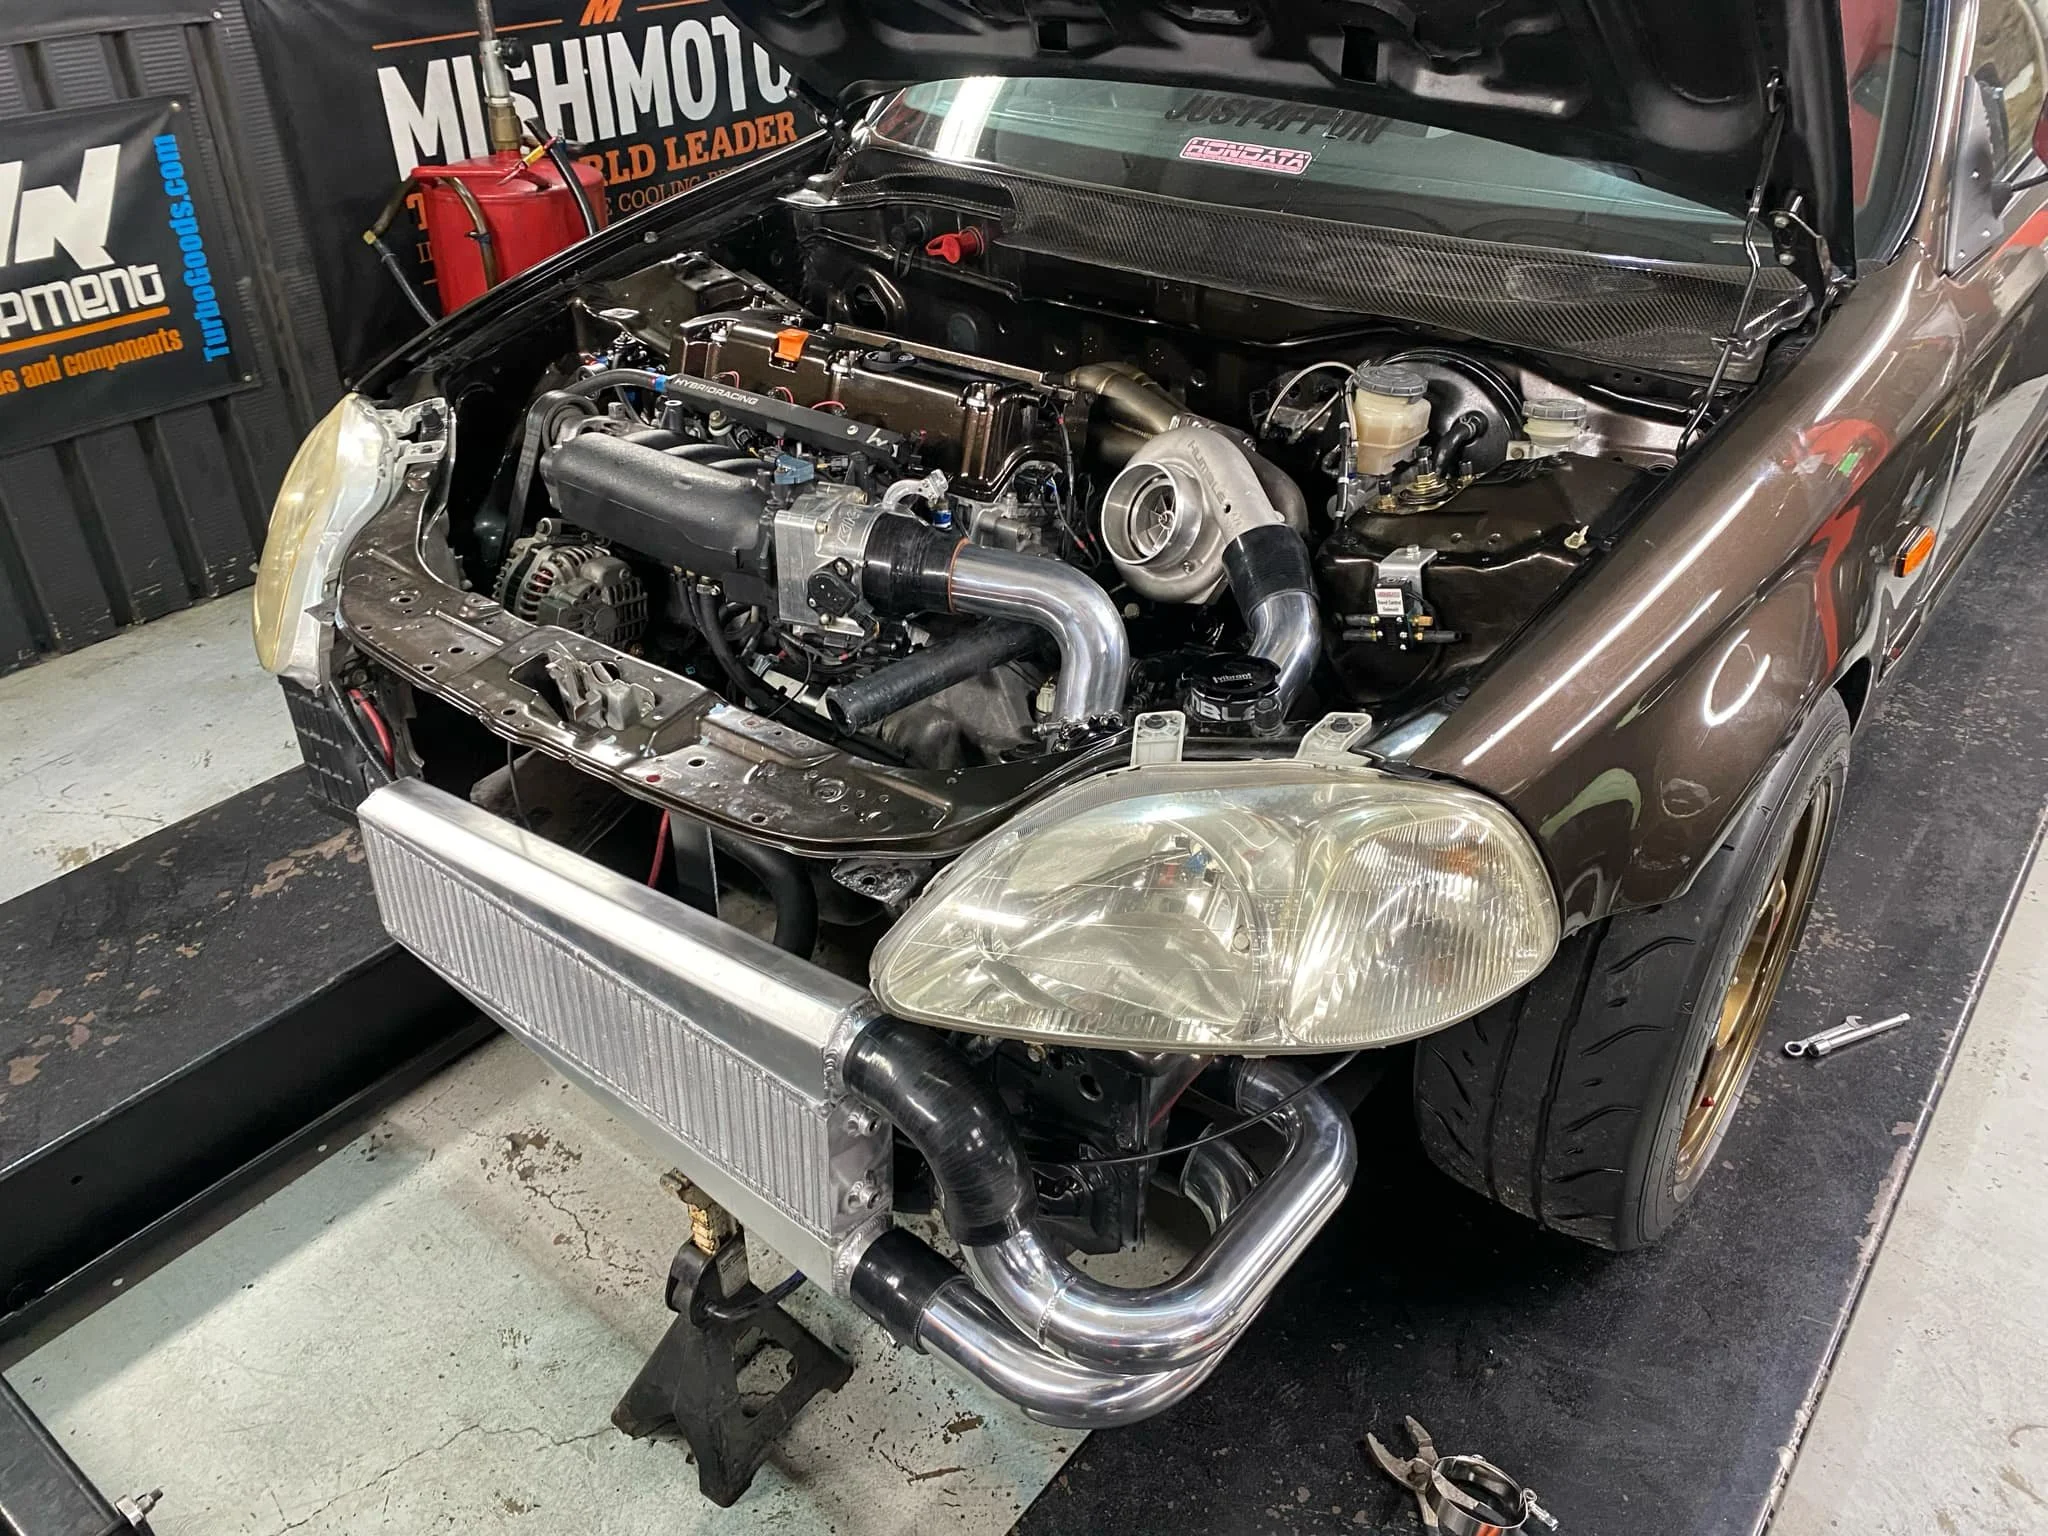
The final kit after assembly.